Thursday, April 20, 2017

Bob Helps With the TBI.


Finishing the Throttle Linkage.

After breakfast I went out to the shop and started the last part of building the throttle linkage.

I had to drill a small hole near the end of the bent part of the rod  so I could insert a cotter pin in the hole to secure it in place.
Also, when I was welding on one of the levers I kind of blew it up. I was afraid that it might break in the middle of nowhere so I decided to fix it. Basically I made a new lever and brazed it alongside the old one.
I got that done and installed it on the TBI

Unfortunately I didn’t take any pictures this morning.

Bob Showed Up.

After noon Bob showed up. He came over to supervise and clear up some questions I had about the installation.
With his advice I finished hooking up all the electrical connections and the fuel lines.
We finished around 6:00 and decided that that was enough for today.

Bob Took some pictures you can see at… 

http://www.bobseyes.net/

What’s Next ?

Now I just have to tidy up the wiring, get the exhaust system welded up, install the O2 sensor, swap the position of the temp sensor, refill the radiator and probably a dozen other things that I can’t think of right now, I think this job will be done.
As long as it runs when I try to start it, that is.

Wednesday, April 19, 2017

More Work on the TBI.


Throttle Linkage.

I’m still working on the linkage for the TBI.
I had to lengthen this piece of linkage so the throttle would have full travel. To do so I had to cut the end off the link so I could still use the connector on the end.

IMGP0517

Then weld another longer piece to it.

IMGP0519

I installed this part and tested the operation of the linkage.

It turned out that I had the linkage connected to the wrong lever and it was moving in the opposite direction from what it should.

I moved the linkage to the lower lever but it turned out that that lever was too short to move the throttle all the way to full.

By this time I was too tired to make any good decisions so I quit for the day.

Overnight.

During the night, I realized that I could shorten the connection to the TBI throttle by drilling a hole in the lever closer to the pivot point. That should allow the proper amount of movement necessary to move the throttle to full.

IMGP0520

You can see the original hole at the end of the triangle and where the link goes through the new hole.

Helping Loraine.

Around noon, we went to our friend, Loraine, to help her remove the cover on her pool and pick up some stuff that she wants to get rid of.

We met Joanne and Dave there with their pickup. We needed the pickup so we could hall a couple large rugs in the back.

After removing the pool cover we went to lunch at Ozzie’s Grill. Good hamburgers!

We went back to Loraine’s after lunch and loaded the rug’s and a couple of other things in Dave’s pickup and brought them back to our place. We unloaded the rug’s and sat around for a while then decided to play some cards. Joanne and Dave left around 7:30.

Okay, that takes care of the last couple of days. I’ll be continuing to work on the TBI installation today.
Bob is coming by this afternoon to answer some questions that I have and maybe lend a hand.

Monday, April 17, 2017

More Work on the TBI.


Wiring the TBI.

I got a lot of the wiring on the TBI and got the fuel return line connected to the tank and run along the frame toward the engine. I also made a bracket to mount the MAP sensor on.

IMGP0516


Throttle linkage.

I had originally thought that I would have to bend the triangle part that is attached to the accelerator to get the linkage to hook up but it turned out that I could accomplish the same thing by straightening the short connecting rod.

you can see the rod and the triangle piece here.

IMGP0513

I had to take all the kinks out of the rod.

IMGP0511

Once I got the rod straightened out I hooked it up and found that the lever that the rod is connected to hits the bottom of the manifold. The throttle only opens up half way.

Okay, I’ll have to do something with that.

Maybe if I extend the lever it will move the throttle all the way.
I did that, adding about 1.5 inches to the length of the lever and it moves the throttle all the way now.
Unfortunately now, a different lever is hitting the back of the engine compartment restricting the movement of the throttle.
I think if I shorten the connecting rod between these two levers it should work.
By the time I was at this point it was almost 7:00pm and I stopped there.

Today.

Okay that is where I will start today. I plan to also connect the fuel lines and the rest of the wiring. 

Sunday, April 16, 2017

TBI Project Continues.


Fuel Return.

The first thing to do today is install the fuel return line. That went pretty well.

Large Hole.

Next I had to make a large hole in the side of the engine compartment; I used a 2” knock out punch to make the hole. The hole had to be big enough to get three large plugs through.

IMGP0502

I’ll have to figure some way to seal the hole off.

Coolant Connection.

Next I had to swap the upper radiator hose connection for one that had a threaded hole in it for a coolant temperature sensor.

IMGP0503

Installing the TBI.

Next it was time to install the TBI unit. It took me a while to figure out which way the TBI went on.. At first I had it 90° off and couldn’t see why it wouldn’t line up with the mounting holes. Eventually I figured it out and got the TBI in place.

IMGP0506 

Throttle Linkage.

I tried hooking the throttle linkage up but I will have to bend that triangle piece so that the linkage will line up vertically. It looks like the old throttle linkage will work.

IMGP0505

It was getting late and I was tired so I decided to quit for the day and start at that point tomorrow.

Saturday, April 15, 2017

TBI System the Fuel Pump.


The Fuel Pump.

The plan for yesterday was to install the high pressure electric fuel pump and the fuel return line. 

Fuel Return.

The TBI uses a circulating fuel system. The fuel is pumped from the tank to the TBI under high pressure.
The fuel that isn’t used in running the engine returns to the tank through the fuel return line.
The van doesn’t have a return line but fortunately the tank does have a fitting for a fuel return line.
To get to the fitting the fuel tank has to be dropped. Ideally the tank should be empty when you do this.
Of course this tank holds 38 gallons and is about half full.

The big black thing is the tank.

IMGP0495

Removing the tank isn’t real hard. There are  four “J” bolts holding it up.
With the floor jack it is easy to remove the nuts and lower the tank.

The tough part is dealing with the filler connection.

IMGP0496

Getting the filler pipe and vent disconnected is tough but getting them back on is a real pain in the neck and took forever.

Once the tank was down it took a few minutes to install the rubber line to the fitting on top of the tank. Once that was done the tank was lifted into place and the “J” bolts tightened.
The next hour or more was spent getting the filler pipe connected.

The Fuel Pump and Filter.

The next thing to do was to figure out where to put the pump. I looked at my options and decided that Bob had his in the best place so I installed the fuel pump in the same place he did; against the frame above the rear axel with the filter mounted vertically against the tank.

IMGP0498

Return Line.

By the time I had the fuel pump installed it was around 4:30 and I was done for the day. I’ll do the return line and the wiring for the pump on Saturday.

Friday, April 14, 2017

A Couple of Days Goofing Off and the TBI Kit Arrives


Goofing Off.

Wednesday and Thursday were kind of slow. I have been just checking out and organizing what I would do when the TBI kit gets here.
I bought some steel tubing for the fuel return line and some ‘hard to get’ clips and rod connectors for the throttle linkage.

On Wednesday I went with Patti to the eye doctors so she could get some measurements done and a good inspection of her eyes before she has cataract surgery on June 1st.

The TBI Kit Arrives

Thursday, in the late afternoon the TBI kit arrived. I unpacked the box and found a lot of parts and one amazing wiring harness.

IMG_6248

Unfortunately I wasn’t able to convince the guy I ordered the kit from that I needed a cable connection on the throttle body. I will have to fix that.

Today, I will start with the installation of the electric fuel pump and fuel lines.

Wednesday, April 12, 2017

A quick ride to the Cabin.


It was supposed to rain off and on Tuesday so I decided to take a ride to the cabin, just for the day, to check things out.
It is the first chance that I have had to get up there since we got back from AZ and I was chomping at the bit.

On the Road

I was on the road by 9:30
It was a nice green ride on 128, with some rainy spots.

IMG_6222

Once I got to Boonville I stopped at the store to get a sandwich for lunch. They make good deli sandwiches at the Boonville Market.

Once I had lunch taken care of I continued toward the cabin.

Peachland Road.

Peachland Road is open but in poor shape; lots of pot holes, small slides, and deep puddles.
The worst spot is this slide. The road here is pretty narrow but wide enough for this truck to get through.

IMG_6224

There is another spot where the road has slumped about a foot or more, for a distance of twenty-five or thirty feet.

Cold at the Cabin

Eventually I got to the cabin.
It was raining lightly and it was very cold. The first thing I did was to get a fire going in the wood stove.
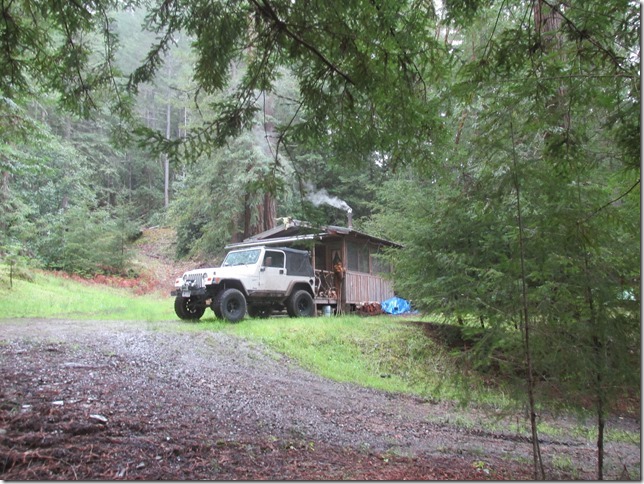
IMG_6230

While the cabin was warming up I took a little walk around the compound.

I noticed that Dave had done a good job repairing the roof on the wash house.
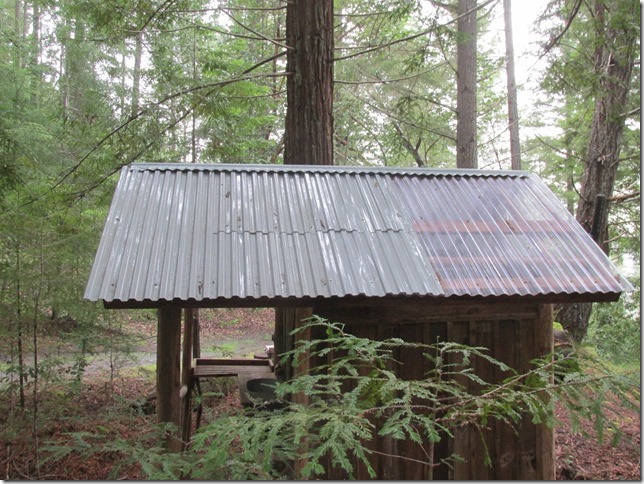
IMG_6229

There is plenty of water coming out of the overflow for the cabin spring.

IMG_6228

I went back in the cabin to warm up and sat in front of the stove enjoying the heat for a while. Eventually I decided to eat the sandwich I bought at the Market. I brought a couple of envelopes of cocoa with me so I heated some water for a cup of hot cocoa to go with the sandwich.

After lunch I drove the jeep up the hill to check out the springs.

Everything looked good at the barrels and there was a good amount of water coming out of the overflow.

IMG_6233

The crossing is holding up nicely.

IMG_6234

I drove up to the trailhead and parked the jeep.

IMG_6235

I had to move a few limbs to clear the trail.

IMG_6236

That’s better.

IMG_6240

I walked out the trail, crossed the creek and came to where the plastic pipe comes down from the spring to the barrels. When I stopped to look at the pipe I heard water spraying out not far away.
When I checked it out, I found there were several places along the pipe where squirrels had chewed holes in it and water was spraying out.

IMG_6237

I went back to the cabin to see what I could find to fix the pipe. As it turned out there wasn’t much. All I could come up with was some electrical tape, some duct tape and a length of 1” plastic pipe.  What I needed was 1/2” pipe and some connectors.

I took what I had and went back up the hill to the leaky pipes.
I had to cut out sections of the pipe as the holes were spread apart.
I wrapped the ends of the 1/2” pipe with the electrical tape and then stuffed the 1/2” pipe into the 1” pipe. Then I tried taping around the connection with the duct tape but everything was too wet for the duct tape to work. 

IMG_6241

I managed to slow down the leaks but I’ll have to come back with some 1/2” pipe and barb connectors to fix the leaks.

I went back to the cabin and hung out enjoying the fire until it was burned out, around 4:30.
It was time to go home since I promised Patti I would be home by dark.